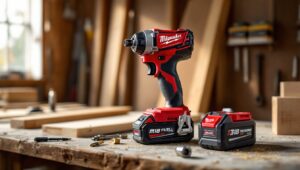


An impact driver sits somewhere between a drill and a sledgehammer, delivering rotational blows that drive screws and fasteners with authority and zero cam-out. If you’ve ever stripped a screw head or felt your wrist twist while driving long deck screws, you already know why this tool exists. Unlike a standard drill, an impact driver uses concussive rotational force to power through tough materials without stalling. It’s louder, more aggressive, and once you’ve used one, going back to a drill for driving tasks feels like using a butter knife to chop firewood. This guide walks through exactly how to use an impact driver safely and effectively, from loading bits to driving your first fastener.
Table of Contents
ToggleKey Takeaways
- An impact driver delivers up to 4,000 rotational impacts per minute, providing 1,500–2,000 in-lbs of torque to drive screws without cam-out or wrist strain.
- Impact drivers use a quick-change ¼-inch hex collet that accepts hex-shank bits only; standard round-shank drill bits will not fit.
- To drive a screw effectively, position the tool perpendicular to the surface, apply steady downward pressure, squeeze the trigger gently to thread the screw, then increase speed as resistance builds.
- Avoid overdriving screws, skip pilot holes only in softwoods, and always wear hearing protection and safety glasses—impact drivers generate 100–110 decibels during operation.
- Impact drivers excel at fastening but struggle with precision drilling in metal or masonry; use a standard drill for detailed drilling tasks and reserve the impact driver for driving fasteners.
What Is an Impact Driver and Why You Need One
An impact driver is a compact power tool designed specifically for driving screws, lag bolts, and other fasteners into wood, metal, and composite materials. It differs from a cordless drill in one critical way: instead of applying constant rotational force, it delivers rapid rotational impacts, up to 4,000 impacts per minute, that prevent cam-out and drive fasteners with minimal effort from the user.
The tool’s internal mechanism uses a spring-loaded hammer and anvil system. When resistance builds (say, driving a 3-inch deck screw into pressure-treated lumber), the hammer engages and delivers quick, percussive blows in the direction of rotation. The result? More torque, less strain on your wrist, and faster work.
Why choose an impact driver over a drill? First, torque. Most 18V impact drivers deliver 1,500 to 2,000 in-lbs of torque, compared to 400–600 in-lbs for a standard drill. Second, control. The hammering action reduces the reactive twisting force, so you’re less likely to lose your grip or strip screws. Third, compactness. Impact drivers are shorter and lighter than hammer drills, making them ideal for tight spaces like cabinet installs or framing work between studs.
They’re not universal, though. Impact drivers excel at driving but struggle with precision drilling, especially in metal or masonry. For those tasks, keep your drill handy.
Getting Started: Parts and Features of an Impact Driver
Before you pull the trigger, familiarize yourself with the tool’s anatomy. Most impact drivers share these core components:
Hex collet (or chuck): Unlike a three-jaw drill chuck, impact drivers use a ¼-inch hex collet that accepts hex-shank bits only. There’s no key and no twisting, just push the bit in until it clicks, or pull the collar forward to release. This quick-change system is a huge time-saver on jobs requiring multiple bit swaps.
Variable-speed trigger: Pressure on the trigger controls speed. Gentle squeeze = slow start: full squeeze = maximum RPM (typically 2,500–3,200 RPM). The trigger’s sensitivity allows finesse when starting screws in softwoods or pre-drilled holes.
Forward/reverse toggle: Located above the trigger, this switch changes rotation direction. Forward drives screws in: reverse backs them out. Always check the toggle before squeezing the trigger, it’s easy to forget after switching tasks.
LED work light: Most modern impact drivers include an LED near the collet that illuminates when the trigger is pressed or shortly after. It’s surprisingly useful in dim corners or overhead work.
Belt clip and battery release: The belt clip (usually removable or reversible) lets you holster the tool between tasks. The battery release button sits at the base: press it and slide the battery pack off. Most 18V or 20V Max batteries are interchangeable across the same brand’s tool lineup.
Torque and speed modes: Some mid-range and pro models offer multiple speed or torque settings. Mode 1 is slower with less impact force (good for drywall or finish work): Mode 2 or 3 delivers full power for structural fasteners. Check your model’s manual.
Loading Bits and Preparing Your Impact Driver
Impact drivers require hex-shank bits with a ¼-inch hex base. Standard round-shank drill bits won’t fit. Most bit sets labeled “impact-rated” are heat-treated and designed to withstand the hammering action without shattering.
To load a bit:
- Ensure the tool is off and the battery is removed (optional but safer during initial setup).
- Pull the hex collet sleeve forward.
- Insert the bit’s hex shank straight into the collet until it seats fully.
- Release the sleeve, it should lock the bit in place with a click or magnetic hold.
- Tug gently on the bit to confirm it’s secure.
If your driver has a magnetic collet (most do), the bit will hold without manually pulling the sleeve. Just push it in.
Bit selection matters. For general screw driving, use a #2 Phillips or square drive (Robertson) bit. For structural work, deck screws, lag bolts, consider impact-rated Torx or square drive bits, which grip better and resist cam-out. Avoid cheap bits: they’ll round off or snap under impact.
Battery prep: Charge your battery fully before starting. An 18V lithium-ion battery typically drives 200–400 screws per charge, depending on screw length and material density. Keep a spare battery charged if you’re tackling a large project like deck framing tutorials.
Fastener prep: Pre-drill pilot holes in hardwoods or near board ends to prevent splitting. For softwoods and composite decking, you can often skip the pilot hole if using self-tapping screws.
Step-by-Step Guide to Using an Impact Driver
Here’s the process for driving a screw with an impact driver, start to finish:
1. Insert the fastener on the bit.
Place the screw on the bit tip. If using a magnetic bit holder or sleeve, the screw will cling: otherwise, hold it in place with your free hand.
2. Position the tool perpendicular to the surface.
Align the bit and screw at a 90-degree angle to the material. Angled driving causes screws to drift or strip.
3. Apply light forward pressure.
Press the tool gently but firmly against the workpiece. The impact mechanism won’t engage properly if you’re not applying steady downward force.
4. Squeeze the trigger slowly.
Start with a gentle squeeze to get the screw threaded into the material. Once it bites, increase speed. The driver will begin hammering once resistance builds, this is normal and sounds like a rapid clicking or chattering.
5. Drive until flush (or slightly countersunk).
Stop when the screw head is flush with the surface. For decking or finish work, you may want the head slightly below the surface. Don’t overdrive, impact drivers have enough torque to snap screw heads or crush softwoods.
6. Release the trigger and let the tool spin down.
The motor will coast briefly. Don’t jerk the tool away immediately.
Backing out a screw:
Flip the forward/reverse toggle to reverse, apply pressure, and squeeze the trigger. The impact action works just as effectively in reverse, making screw removal fast and easy, even if the head is slightly stripped.
For lag bolts or large structural fasteners:
Use a hex-shank socket adapter with the appropriate socket size. These adapters fit into the hex collet and convert your impact driver into a high-torque nut driver. They’re invaluable for assembling bed frames, installing ledger boards, or anywhere you’d normally reach for a ratchet.
Common Mistakes to Avoid When Using an Impact Driver
Impact drivers are forgiving, but a few missteps can damage materials, strip fasteners, or cause injury.
Using the wrong bits.
Impact drivers chew through standard drill bits and cheap screwdriver bits. Always use impact-rated bits made from hardened steel. They’re marked with a black oxide or titanium coating and often have a torsion zone to absorb shock.
Overdriving screws.
The tool doesn’t know when to stop, you do. Overdriving snaps screw heads (especially in hardwoods), splits boards, and crushes drywall or trim. Ease off the trigger as the screw head nears flush. Some users apply a piece of tape on the screw shaft as a depth guide.
Skipping pilot holes in hardwood or near edges.
Even with high torque, driving screws without pilot holes in oak, maple, or within 2 inches of a board edge often causes splitting. Drill a pilot hole that’s slightly narrower than the screw shank.
Forgetting to toggle forward/reverse.
It happens more often than you’d think, especially after removing a screw. Double-check the toggle direction before pressing the trigger.
Not applying enough pressure.
Impact drivers rely on downward force to engage the hammer mechanism. If you let the tool bounce or hold it loosely, it won’t drive effectively and you’ll strip screw heads. Lean in.
Using it for drilling.
While you can drill with an impact driver using a hex-shank drill bit, it’s not ideal. The hammering action makes it hard to control depth and can crack brittle materials. For detailed project instructions that involve drilling and driving, use a drill for holes and the impact driver for fasteners.
Best Practices and Safety Tips
Impact drivers are relatively safe, but they’re powerful and loud. Follow these practices:
Wear hearing protection.
Impact drivers generate 100–110 decibels during operation, loud enough to cause hearing damage with prolonged exposure. Foam earplugs or earmuffs are essential for extended use.
Use safety glasses.
Flying debris, broken screw heads, and metal shavings are real risks, especially when backing out old or corroded fasteners.
Secure your workpiece.
Clamp or brace the material you’re fastening. The rotational force from an impact driver can spin lightweight boards or sheet goods if they’re not held firmly.
Keep fingers clear of the bit and fastener.
The tool can slip, and the bit can catch clothing or skin. Never hold a screw in place with your fingers while pulling the trigger.
Check the battery and trigger lock.
Remove the battery when changing bits, especially if you’re working in a chaotic environment. Some impact drivers have a trigger lock: engage it when carrying the tool.
Match the fastener to the task.
Use structural screws (like GRK or Spax) for framing and ledger boards. Use finish screws or trim-head screws for cabinetry and trim. The right fastener makes the tool more effective and the joint stronger.
Don’t force it.
If a screw isn’t driving smoothly, stop. Check for misalignment, a dull bit, or a pilot hole that’s too small. Forcing it risks snapping the fastener or damaging the tool.
Clean and maintain the collet.
Sawdust and metal shavings can clog the hex collet, preventing bits from seating properly. Blow it out with compressed air or tap it gently to dislodge debris.
For those exploring how impact drivers compare to drills, understanding these differences in handling and safety makes a measurable difference in project outcomes.
Conclusion
An impact driver is one of those tools that changes how a DIYer works. It’s faster than a drill for driving, easier on the wrist, and tough enough for structural fastening. Learn the basics, hex collet, forward pressure, trigger control, and the tool does the heavy lifting. Start with a few practice screws in scrap lumber to get a feel for the impact action and trigger sensitivity. Once you’re comfortable, it’ll become the first tool you reach for on nearly every project.