
An impact driver looks like a drill, sounds like a jackhammer, and drives screws faster than anything else in your toolbox. It’s the one tool that makes professional carpenters and weekend warriors equally enthusiastic, and for good reason. Unlike a drill that spins continuously, an impact driver delivers rotational force in quick, powerful bursts that punch through resistance without stripping screws or numbing your wrist. If you’re building a deck, hanging cabinets, or assembling furniture, learning to use this tool properly will save time, prevent fatigue, and deliver cleaner results. Here’s how to get the most out of your impact driver.
Table of Contents
ToggleKey Takeaways
- An impact driver uses a spring-loaded hammer-and-anvil mechanism to deliver concussive bursts of torque, enabling you to drive screws faster and with less wrist fatigue than a traditional drill.
- Always start with slow trigger control to thread screws properly, maintain firm downward pressure, and release the trigger as the screw head approaches the surface to avoid over-driving.
- Over-driving is the most common mistake—the impact driver’s power can bury screws past flush in softwoods or drywall within seconds, so trigger control and practice on scrap material are essential.
- Use impact-rated driver bits with the correct size and type (Phillips, square drive, or Torx) and always wear safety glasses and hearing protection since impact drivers produce 90-100 decibels under load.
- Select the appropriate speed and torque settings for your project: low speed for precision work and smaller fasteners, high speed for deck screws and heavy-duty applications.
What Makes an Impact Driver Different from a Regular Drill
The key difference lies in how each tool delivers torque. A cordless drill applies constant rotational force, which works well for drilling holes and driving small fasteners. When resistance increases, the drill either stalls or the bit cams out of the screw head.
An impact driver uses a spring-loaded hammer-and-anvil mechanism. When the tool encounters resistance, the internal hammer rotates and strikes the anvil in rapid succession, up to 3,000 impacts per minute on some models. This creates short bursts of rotational force, called concussive blows, that power through dense materials without camming out or stripping screws.
Because the impact mechanism absorbs most of the torque, there’s minimal reactionary force transferred to your wrist and arm. You can drive 3-inch deck screws all day without the fatigue that comes from wrestling a drill/driver. The trade-off is noise and vibration, impact drivers are loud, and you’ll feel that rapid hammering through the handle.
Impact drivers also use a ¼-inch hex chuck instead of a keyed or keyless chuck. This means faster bit changes, just pull the collar, drop in a hex-shank bit, and release. You can’t use round-shank drill bits without an adapter, but for driving fasteners, the hex system is faster and more secure.
Most DIYers who try an impact driver on renovation projects never go back to using a drill for screws. The difference in speed and control is that noticeable.
Getting Started: Loading Bits and Adjusting Settings
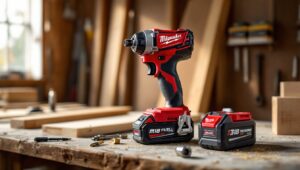
Before driving your first screw, make sure the battery is fully charged. Most 18V or 20V lithium-ion batteries provide adequate power for typical projects. A 4.0Ah battery offers a good balance between runtime and weight.
To load a bit, pull back the ¼-inch hex collet near the front of the tool. Insert a hex-shank driver bit, Phillips, square drive, or Torx, and release the collar. Tug gently on the bit to confirm it’s seated. If it wiggles or pulls out easily, remove and reseat it.
Most impact drivers have a variable-speed trigger. Squeeze lightly for slow, controlled starts: squeeze harder for full speed. This trigger control is critical when starting screws to prevent slipping or cross-threading.
Many models also include a speed or torque selector switch near the base. Low speed (around 1,000 RPM) suits precision work and smaller fasteners. High speed (2,000+ RPM) handles deck screws, lag bolts, and heavy-duty applications. Some newer models have electronic torque settings, useful when assembling furniture or cabinetry where over-driving can crack wood or strip threads.
The forward/reverse selector is typically a sliding switch above the trigger. Forward drives screws in: reverse backs them out. Always double-check the direction before pulling the trigger, especially when switching between tasks.
Step-by-Step Guide to Driving Screws with an Impact Driver
1. Mark and pre-drill if necessary. For hardwoods, dense materials, or screws near board edges, pre-drill a pilot hole slightly smaller than the screw’s shaft diameter. This prevents splitting and makes driving easier. Softwoods like pine often don’t require pilot holes for smaller screws.
2. Select the correct driver bit. Match the bit to the screw head, #2 Phillips for most general-purpose screws, square drive (Robertson) for deck screws, or Torx for structural fasteners. A worn or wrong-size bit will cam out and damage the screw head.
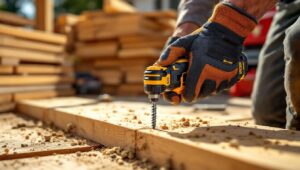
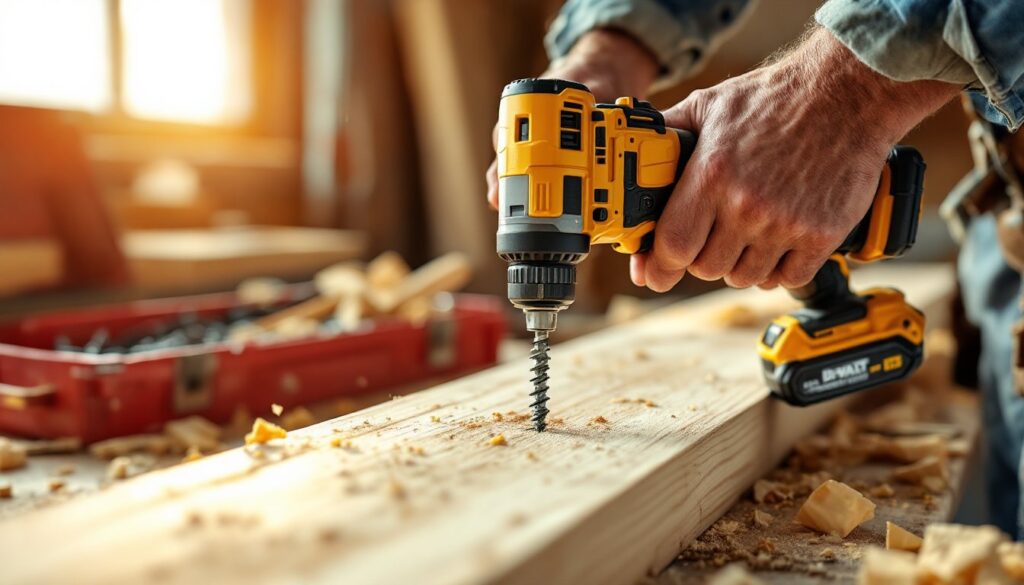
3. Position the bit in the screw head. Hold the impact driver perpendicular to the work surface. Press firmly to keep the bit seated in the screw head, this is especially important during the initial engagement.
4. Start slowly. Lightly squeeze the trigger to start the screw threading into the material. Keep steady downward pressure. The screw should begin to pull itself in without wobbling. If it cross-threads, stop, back it out, and restart.
5. Let the impact mechanism do the work. Once the screw is started, you’ll hear the hammering sound as the tool encounters resistance. Don’t lean heavily on the driver, excess pressure doesn’t help and can strip the screw head. The concussive action delivers the torque, not brute force.
6. Stop at the right depth. For flush installation, release the trigger as the screw head nears the surface. The impact driver’s power can easily over-drive and countersink the screw too deeply, splitting wood or damaging drywall. Practice on scrap material to develop trigger control.
7. Back out mistakes immediately. If a screw goes in crooked or strips, switch to reverse right away. A stripped screw is harder to remove once seated.
Common Mistakes to Avoid When Using Your Impact Driver
Over-driving screws is the most frequent error. The tool’s torque can bury a screw past flush in a split second, especially in softwoods or drywall. Ease off the trigger as the head approaches the surface. For consistent depth, consider a depth-sensitive screw bit with an adjustable collar.
Using the wrong bit size leads to stripped screw heads and frustration. A #1 Phillips bit in a #2 screw head will cam out immediately. Keep a variety of bits on hand and inspect them for wear, replace any with rounded or chipped tips.
Not maintaining downward pressure causes the bit to skip out of the screw head, especially during the initial engagement. Think “push then pull (the trigger)”, steady pressure keeps the bit seated.
Forgetting ear protection is a mistake you’ll regret after an hour of deck-building. Impact drivers produce 90-100 decibels under load, enough to cause hearing damage with prolonged exposure. Foam earplugs or over-ear protection should be standard PPE.
Ignoring battery charge levels mid-project leaves you with half-driven screws. Keep a spare battery charged, or use the battery gauge if your tool has one. Low batteries also reduce torque output, leading to inconsistent results.
Using an impact driver for drilling is technically possible with hex-shank drill bits, but it’s not ideal. The hammering action can crack masonry bits and makes it harder to control hole depth. Use a drill for precision holes: save the impact driver for fasteners.
Safety Tips and Best Practices for Impact Driver Use
Always wear safety glasses when driving fasteners. Screws can snap, and bits occasionally shatter under high torque, both send metal fragments flying.
Use hearing protection. The repetitive hammering is loud enough to exceed OSHA’s 85-decibel action level. If you’re working indoors or on extended projects, protect your ears.
Secure your workpiece with clamps or a vise. The sudden torque from an impact driver can spin smaller pieces, pinching fingers or ruining alignment. Never hold small parts by hand while driving screws.
Keep fingers clear of the bit path. An impact driver won’t stop if it slips, that spinning bit can cause serious lacerations. Position your non-dominant hand well away from the screw and bit.
Disconnect the battery when changing bits or making adjustments. Accidental trigger pulls happen, especially when tools are set down or handed off. Removing the battery eliminates this risk.
Check for hidden wiring and plumbing before driving screws into walls, floors, or ceilings. Use a stud finder with wire detection or consult building plans. A screw through a live wire or water pipe creates expensive, dangerous problems.
Use the correct fasteners for the material. Drywall screws in pressure-treated lumber will corrode. Structural applications require code-approved fasteners, check the IRC (International Residential Code) or local amendments for requirements on deck ledgers, joist hangers, and shear walls.
Choosing the Right Bits and Accessories for Different Projects
Driver bits are the most essential accessory. Invest in a quality impact-rated bit set, these are heat-treated to withstand the hammering forces. Standard bits will twist or shatter under repeated use. Look for sets that include multiple sizes of Phillips, square drive, and Torx bits.
Magnetic bit holders extend your reach and hold screws on the bit tip, useful when working in tight spaces or overhead. A 6-inch holder provides better access into joist bays and cabinet interiors than the short holder included with most tools.
Hex-shank drill bits let you drill pilot holes without switching tools, though they’re less precise than using a drill. Keep a small set on hand for quick tasks. For serious drilling, experienced builders following detailed guides still prefer a dedicated drill.
Nut drivers and socket adapters turn your impact driver into a light-duty wrench. Hex-shank sockets work for assembling furniture, tightening lag bolts, or running nuts on carriage bolts. Don’t use these for automotive work, impact drivers lack the torque control needed for precise fastener tension.
Right-angle attachments help drive screws in confined spaces like inside cabinets or between studs. The extra gear reduction also slows the speed for finer control.
Bit storage matters more than you’d think. Loose bits in a bag get lost or damaged. A belt-clip bit holder or magnetic wristband keeps commonly used bits accessible during projects. Many online communities share creative storage solutions that work better than factory cases.
Conclusion
An impact driver isn’t just a convenience, it’s a game-changer for anyone driving fasteners regularly. The combination of high torque, minimal wrist strain, and fast bit changes makes it indispensable for deck-building, framing, cabinetry, and general assembly work. Start with simple projects to develop trigger control and get comfortable with the tool’s power. Once you’ve driven a few dozen screws, the speed and efficiency will feel natural, and you’ll wonder how you managed without one.