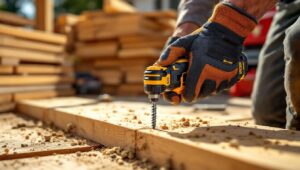

If you’ve ever tried driving long deck screws with a standard drill, you know the wrist-twisting struggle. Halfway through, the drill bogs down, the bit cams out, and your forearm feels like you’ve been arm-wrestling a lumberjack. That’s where an impact driver earns its keep. It delivers fastening torque with a fraction of the effort, but how it does that isn’t obvious from the outside. Unlike a drill that spins continuously, an impact driver uses a hammer-and-anvil mechanism to generate rapid, concussive bursts of rotational force, making it indispensable for driving fasteners into dense material or working overhead without fatigue.
Table of Contents
ToggleKey Takeaways
- An impact driver uses a hammer-and-anvil mechanism to deliver rotational force in rapid bursts rather than continuous rotation, enabling you to drive long fasteners with minimal wrist strain and effort.
- Impact drivers excel at driving long screws and structural fasteners into dense materials like framing lumber and hardwood, but should not replace a drill for pilot holes and delicate trim work.
- The distinctive rapid-fire clicking sound indicates the percussive action that reduces cam-out and prevents bit slipping, allowing faster and cleaner fastening in overhead or awkward-angle positions.
- For home projects, an 18V or 20V cordless impact driver with at least 1,500 in-lbs of torque handles decking, framing, and subfloor installation efficiently when matched to the right task.
- Impact drivers are purpose-built fastening tools that reduce fatigue on repetitive jobs like deck construction and fence building, making them an essential companion tool alongside a standard drill in any serious DIY toolkit.
What Is an Impact Driver and Why It Matters for Home Projects
An impact driver is a power tool designed specifically for driving screws, lag bolts, and other threaded fasteners. At first glance, it resembles a compact drill. But instead of relying solely on motor speed and continuous rotation, it delivers torque in short, powerful bursts, often 50 or more per second. That percussive action lets you sink 3-inch construction screws into framing lumber without pre-drilling or stripping heads.
The tool’s collet accepts ¼-inch hex-shank bits only, which lock in place without a chuck. This design minimizes bit slip and makes one-handed bit changes quick. Most DIYers notice two immediate benefits: less wrist strain and faster fastening. When you’re hanging cabinets, building a deck, or assembling furniture, those advantages add up quickly.
For home projects, an impact driver excels where a drill struggles. Dense hardwoods, long fasteners, and repetitive tasks, like installing subfloor sheathing or driving dozens of joist-hanger nails, become manageable. It’s not a drill replacement: it’s a specialized fastening tool that belongs alongside your drill in any serious DIY toolkit.
The Mechanics Behind Impact Driver Technology
Understanding what happens inside the tool explains why it performs so differently from a drill. The secret lies in a spring-loaded mechanism that converts motor rotation into intermittent, high-torque impacts.
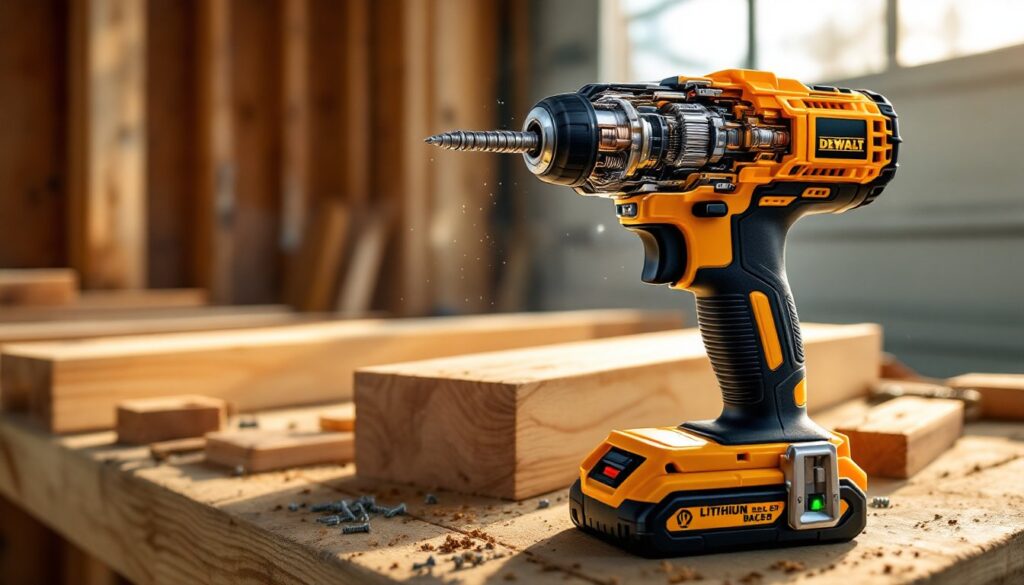
The Hammer and Anvil Mechanism Explained
Inside the impact driver’s gearbox sits a rotating hammer (driven by the motor) and a stationary anvil (connected to the bit). Under light load, like driving a screw into softwood, the hammer and anvil remain engaged, and the tool spins smoothly like a standard drill. But when resistance increases, the hammer compresses a spring, disengages, rotates past the anvil, then snaps back into contact. That sudden collision transfers rotational energy as a sharp, percussive blow.
The cycle repeats dozens of times per second, producing the distinctive rapid-fire clicking sound. Each impact lasts only a fraction of a second, but the cumulative torque is massive, often 1,400 to 1,800 in-lbs on mid-range cordless models, and over 2,000 in-lbs on high-end or pneumatic units. The internal workings of this mechanism demonstrate how relatively simple components can generate enormous fastening power.
Rotational Force vs. Concussive Blows: The Key Difference
A drill applies continuous rotational torque. As resistance grows, the motor either stalls or you fight to hold the tool steady, risking stripped screws or wrist strain. An impact driver sidesteps that problem by delivering torque in concussive bursts. Each blow drives the fastener a tiny increment deeper, and the short duration of each impact means minimal reaction torque transferred to your hand.
This percussive action also reduces cam-out (the bit slipping from the screw head) because the bit stays seated during each brief impact. The result: cleaner work, less fatigue, and the ability to drive fasteners in awkward positions, overhead, at arm’s length, or one-handed, without losing control.
When to Use an Impact Driver Over a Regular Drill
Knowing which tool to grab saves time and prevents damage. An impact driver isn’t a universal solution: it’s purpose-built for fastening.
Use an impact driver when:
• Driving long screws (2½ inches or longer) into framing lumber, decking, or engineered wood
• Installing lag bolts or structural fasteners that require high torque
• Working with dense materials like hardwood, LVL beams, or metal studs
• Repetitive fastening tasks, subfloor panels, fence pickets, drywall to metal track
• Overhead or awkward-angle work where you can’t brace the tool with two hands
Use a regular drill when:
• Drilling holes (impact drivers lack the control and chuck versatility for bits)
• Driving small screws (#6 or smaller) into trim, cabinetry, or delicate materials where over-torque could split wood
• Tasks requiring variable speed and clutch control, like assembling furniture with cam-lock fasteners
• Installing drywall screws in gypsum board (a drill with an adjustable clutch prevents over-driving)
Many experienced DIYers keep both on the bench. For big projects, deck framing, subfloor installation, or fence building, the impact driver handles fastening while the drill handles pilot holes and countersinks. That division of labor speeds up workflows and extends battery life, since each tool runs in its optimal range.
Common Home Improvement Applications
Impact drivers shine in a surprising range of projects. Here’s where homeowners and DIYers see the biggest performance gains.
Deck construction: Driving hundreds of 3-inch deck screws through 5/4 decking into joists becomes a one-person job. The percussive action seats fasteners flush without mushrooming the wood fibers, and you’ll finish in half the time compared to a drill.
Framing and structural work: Installing joist hangers, Simpson Strong-Tie connectors, or lag bolts into rim joists requires high torque. An impact driver delivers it without the kickback that can throw off your aim or strain your wrist.
Subfloor and sheathing installation: Whether you’re laying ¾-inch plywood or OSB panels, driving 2-inch screws every 8 inches along joists is tedious. An impact driver reduces fatigue and keeps the work moving, which matters when you’re covering a whole floor.
Fence building: Post-to-rail connections with 3½-inch lag screws, and picket installation with 2-inch trim-head screws, both are faster and cleaner with an impact driver. Many DIY fence tutorials now assume you’re using one.
Cabinetry and built-ins: While finish carpentry often calls for a drill, assembling carcasses with 2-inch cabinet screws benefits from the impact driver’s speed. Just dial down the torque setting (if your model has one) to avoid stripping softer materials.
Automotive and equipment maintenance: Removing rusted bolts, swapping license plate frames, or assembling lawn equipment, impact drivers handle these chores with ease, though a small impact wrench with a square drive is even better for nuts and bolts.
Safety note: Always wear safety glasses when driving fasteners. Bits can snap under high torque, and metal shavings or wood splinters can fly. If you’re working in enclosed spaces or driving dozens of fasteners, hearing protection is smart, the rapid clicking can exceed 100 decibels at close range.
Choosing the Right Impact Driver for Your DIY Toolkit
Not all impact drivers are created equal. Here’s how to pick one that matches your project scope and budget.
Cordless vs. pneumatic: Most DIYers choose cordless (battery-powered) models for portability and convenience. An 18V or 20V lithium-ion platform (depending on brand) delivers ample torque for framing, decking, and general fastening. Pneumatic impact drivers exist but require a compressor, they’re overkill for home use unless you already run air tools in a workshop.
Torque ratings: Entry-level cordless models deliver around 1,400 in-lbs of torque, which handles most residential projects. Mid-range tools hit 1,600–1,800 in-lbs, and premium models exceed 2,000 in-lbs. For decks, framing, and heavy fastening, aim for at least 1,500 in-lbs. Lighter jobs, assembling furniture or hanging cabinets, work fine with less.
Speed and torque settings: Some impact drivers offer variable speed triggers and multi-speed modes (typically two or three). Mode 1 runs slower for delicate fastening: Mode 2 or 3 unleashes full power. If you plan to use the tool for both trim work and structural jobs, adjustable settings add versatility.
Brushless motors: Models with brushless motors run cooler, deliver more power per battery charge, and last longer than brushed designs. They cost 20–30% more upfront but pay off in durability and runtime, worth it if you tackle multiple large projects per year.
Battery platform compatibility: If you already own cordless tools from a major brand (DeWalt, Milwaukee, Makita, Ryobi, Bosch), buying an impact driver in the same battery system saves money and reduces clutter. You can share batteries across tools and keep spares charged.
Compact vs. standard size: Compact models (often called “sub-compact”) measure around 5 inches head-length and weigh under 2 lbs. They fit tight spaces, cabinet interiors, between studs, but trade some torque (typically 1,200–1,400 in-lbs). Standard models are bulkier but deliver maximum power. For general DIY use, a standard model is more versatile.
Bit retention: Look for a collet with a quick-release sleeve and strong magnetic bit retention. Cheap models let bits wobble or fall out mid-job, which is frustrating when you’re on a ladder. Many home improvement guides recommend testing bit retention before buying, insert a bit, shake the tool, and see if it stays put.
LED work light: An integrated LED near the bit holder illuminates the work area. It sounds minor, but it’s invaluable when you’re working inside cabinets, closets, or unfinished basements.
Price range (as of 2026): Budget cordless impact drivers start around $80–$100 (tool-only), mid-range kits with battery and charger run $150–$200, and premium brushless models with two batteries and a case hit $250–$300. Prices vary by region and retailer promotions, so shop sales around major holidays.
Final tip: If you’re building a cordless tool collection from scratch, many brands offer combo kits that pair an impact driver with a drill/driver, two batteries, and a charger for less than buying separately. That’s often the smartest entry point for new DIYers.